
EPANET is a powerful software yet the information to understand for a self starter is complicated. For a foreign student like me who is accustomed to our own surrounding, this software takes a little time to grasp. Once it is grasped, it has such a huge potential to design accurately and effectively.
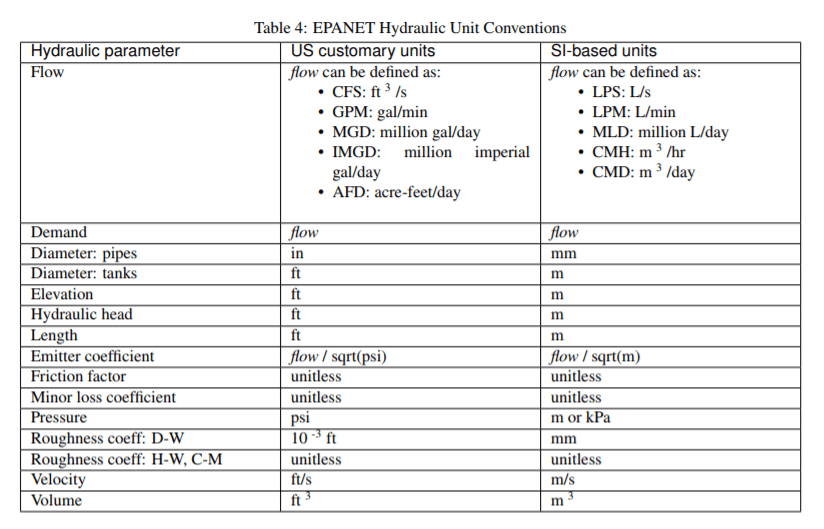
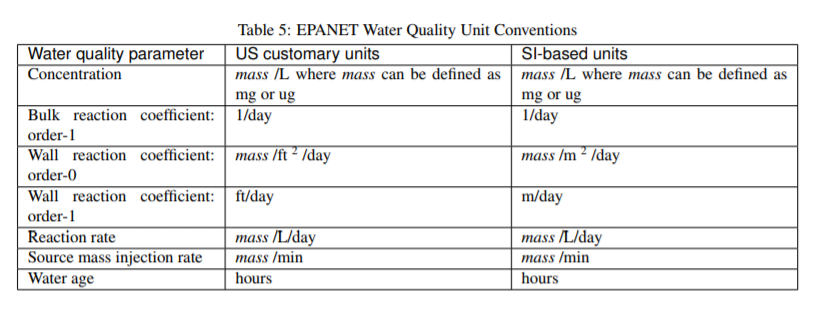
Following are the tables that I find are essential for anyone who wants to try what EPANET is. These are the little nits and bits EPANET developers wants you to memorize before you operate the software or before getting any meaning results.
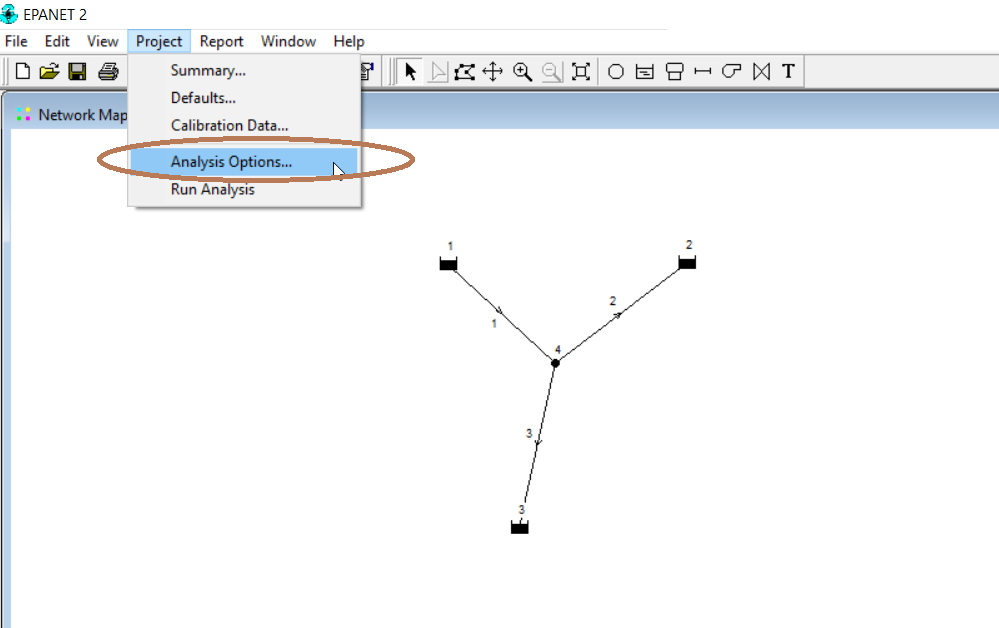
This is very important for one before design. In Nepal we design it based on SI units but the default value in EPANET is US customary units. Thus we need to change the settings to SI before starting to put down all the information of network and demands.
First you need to go to Analysis Options and click it.
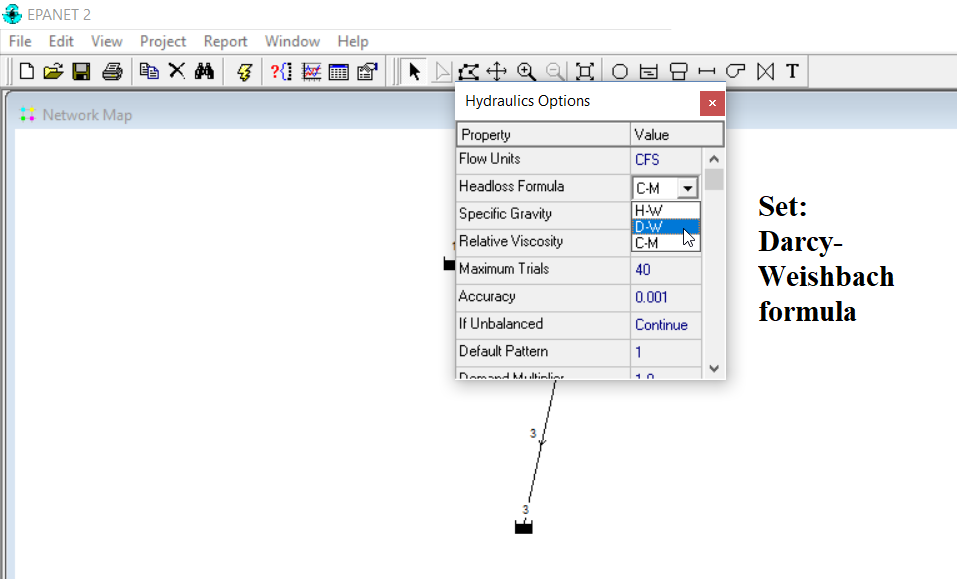
After setting the lps and D-W formula, we can then define our pipe length in metres (m), discharge in (lps), friction factor in millimetres (mm) and so on as shown in Table 4, 5 and 6.
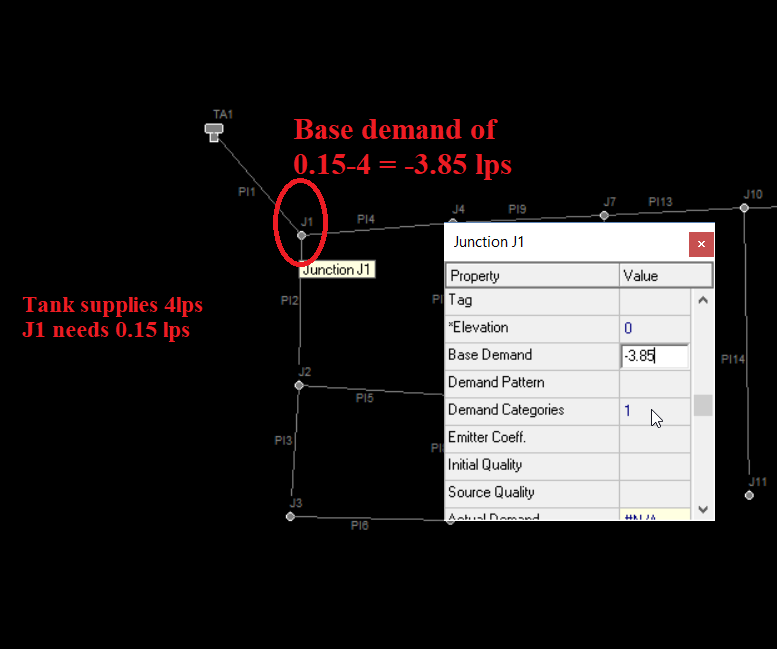
For the starting node, where the water enters the system, the demand in that node should be negative. For example:
Tank supplies 4 lps discharge, while the J1 node has water demand of 0.15lps, the nodal discharge is 0.15-4 = -3.85 lps
Copying and Pasting Object Properties
The properties of an object displayed on the Network Map can be copied and pasted into another object from the same category.
To copy the properties of an object to EPANET’s internal clipboard:
- Right‑click the object on the map.
- Select Copy from the pop‑up menu that appears.
To paste copied properties into an object:
- Right‑click the object on the map.
- Select Paste from the pop‑up menu that appears.